Create your Geo-Cx account
Geo-Cx accounts are created on the web. The person who sets up the organization — usually the company owner or administrator — registers first and chooses a plan. Everyone else on the team is added afterward from inside the platform.
To create your organization's account:
-
Go to geo-cx.com and click Try For Free. You are taken to the registration page at prod.app.geo-cx.com/register.
-
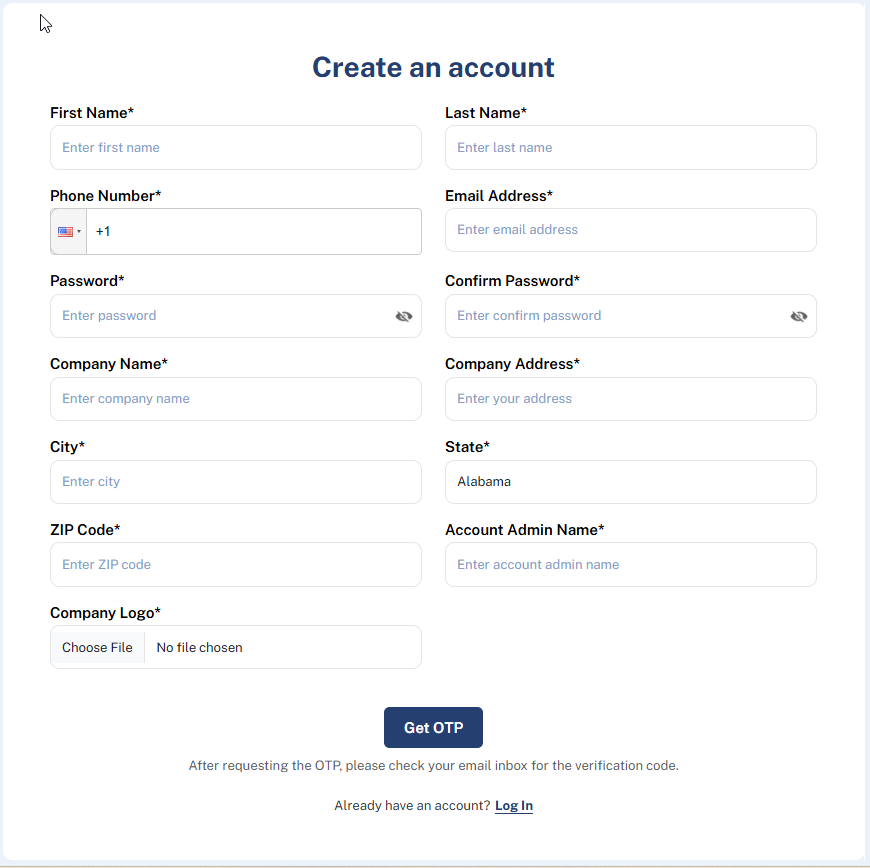
Fill in the registration form and click Get OTP.
-
Check your email inbox for the verification code and enter it when prompted.
-
Click Verify. Your account is created and you are taken to the Geo-Cx dashboard.
You are now the admin of your organization. From here you can add your team, create projects, and configure the platform.
Note: Only one account is needed per organization. Do not create multiple accounts for the same company — all team members are added from inside the platform under Resource Management.
Note: The verification code is sent to the email address you entered in the form. Check your spam folder if it does not arrive within a few minutes.
Tip: Not sure which plan to pick? Both plans include a 30-day free trial at no charge. See Subscription plans & features for a full comparison.
What to do next: Once your account is created, follow the Admin setup guide to get the platform ready for your team:
- Create your first project
- Add your team members
- Create crews and assign them to the project
- Build your first safety form
- Set up roles and permissions